Adding a blog
Click on the Website Management button

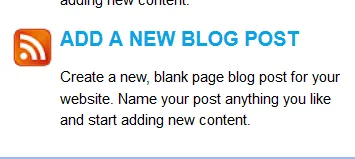
Click on Add a New Blog Post
Enter in the title of the blog post
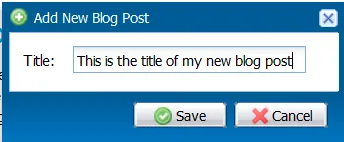
Click Save
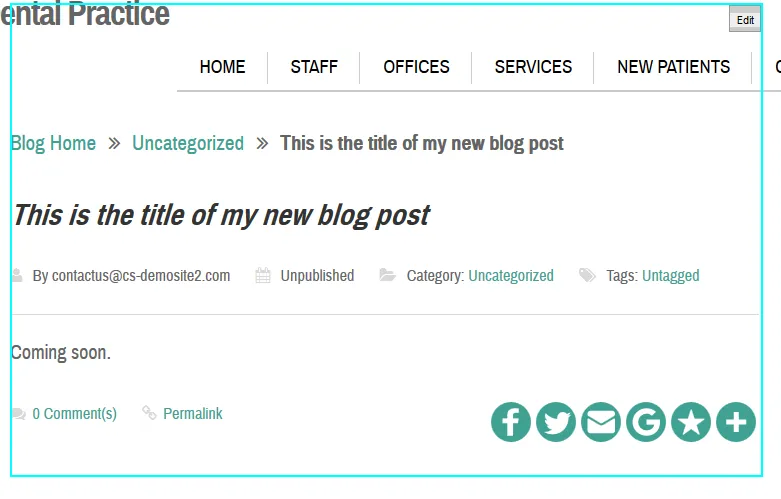
You will now be taken to your blog page
Turn the Editing feature ON

Click the Edit box
Add the content for your blog post.
Click Save.
Click Close.
Click here to learn how to categorize and tag your blog.
To publish your blog, click the GO LIVE button

Click the Go Live! Button.
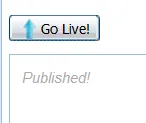
Once the changes are on your website, you will see the message, Published! in the box below the Go Live! button.
If you don’t see your changes immediately, be sure to refresh your browser.
Removing a blog
To remove a blog, you must delete the page instead of disabling it.
Click on Website Management.
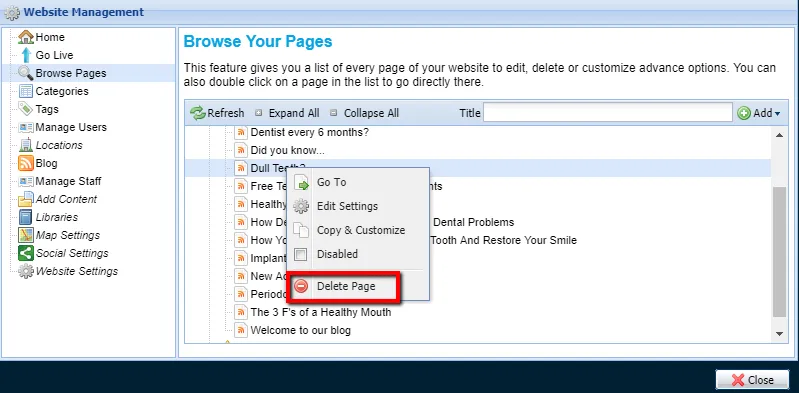
Click on Browse Pages.
Click Expand All.
Right click on the page you wish to remove.
Click on Delete Page.
Click on close and publish your changes.
Categorize and Tag your Blogs
Click on Website Management
Click on Browse your Pages
Click on the + next to the My Blog Posts folder
Right click on the blog you want to add categories and tags and choose Edit Settings.
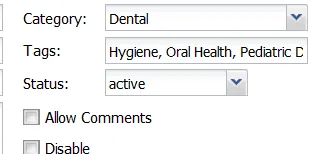
On the screen below, you can change the By Line (author) to your name, the practice name or desired email.

Category – This helps organize your blogs into broader topics. For example, if your specialty is dental, you might make categories such as dental procedures, oral health, etc.
You can enter in the category title and click save. This will attach the category for that blog as well as save it for future blogs.
Tags – Help organize your blogs into specific topics. For example, if you are a dentist and wrote a blog on helping your child develop good oral hygiene habits, you may want to include tags such as oral hygiene, pediatric dentistry, etc.
You can enter multiple tags at once and click save.
When finished, be sure to click save and publish your new blog.
Change the meta information for your blog
Click on Website Management
Click on Browse your Pages
Click on the + next to the My Blog Posts folder
Right click on the blog you want to add categories and tags and choose Edit Settings.
On the screen below, you can change the Title, subtitle, Meta Keywords, and Meta Description.

Once you have made your changes, click on Save, Close and publish your changes.
Note: If your blog already appears in search engine results, it can take up to 3 weeks for Search engines to reindex your website and to reflect the changes you have made to the meta information of your pages.